Module 4: Export and Slicing
5. Multi-Color Painting
When using a multi-color system like the Bambu AMS (Automatic Material System), you must color your design before slicing so the software can map out the filament swaps, purge blocks, and layer instructions.
Match Your Filament Slots: In Bambu Studio’s left sidebar, set your virtual filament slots (1, 2, 3, 4) to match the exact colors currently loaded in your physical AMS.
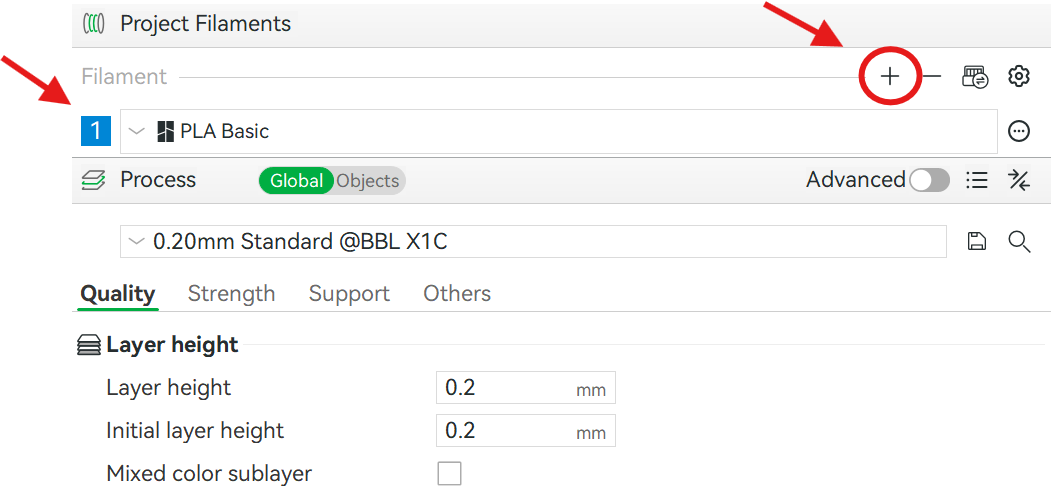
Click "+" sign located on left column under the "Project Filaments" to add new filament color. After adding the required colors, color and type of the filament can be adjusted accordingly.
Paint the Model: Select your 3D model and press N (or click the Color Paint tool icon on the top toolbar) to open the painting tools:
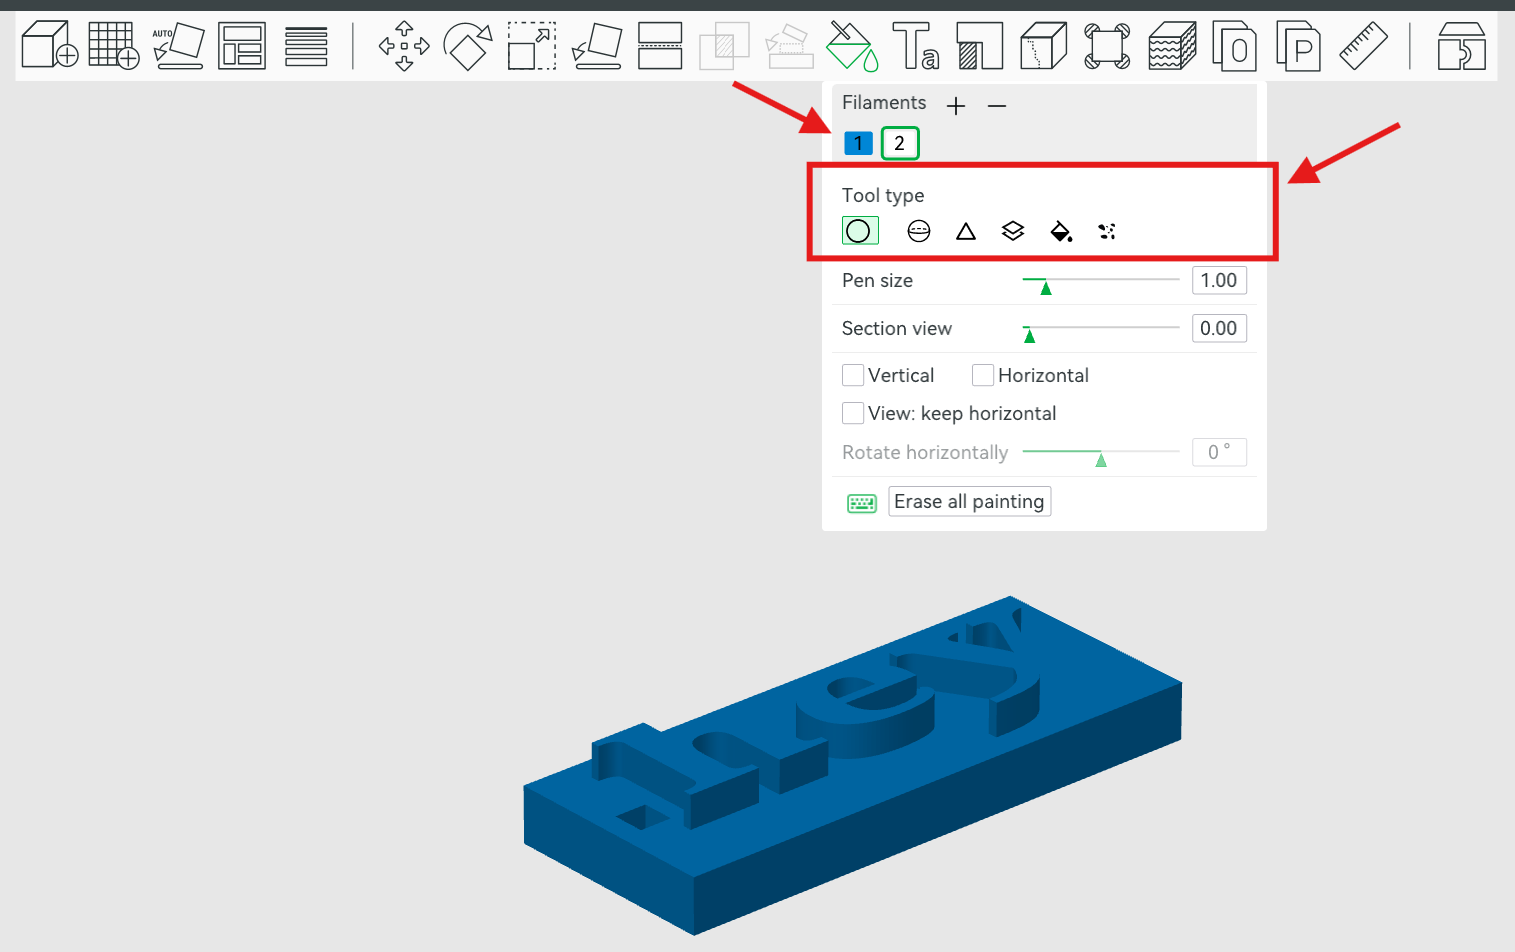
- Fill Tool: Fills an entire distinct face or section with color in one click.
- Paintbrush / Sphere: Lets you freehand paint details directly onto flat or curved surfaces.
- Height Range: Colors an entire horizontal band along the Z-axis (ideal for layered color bases or stacked logos).
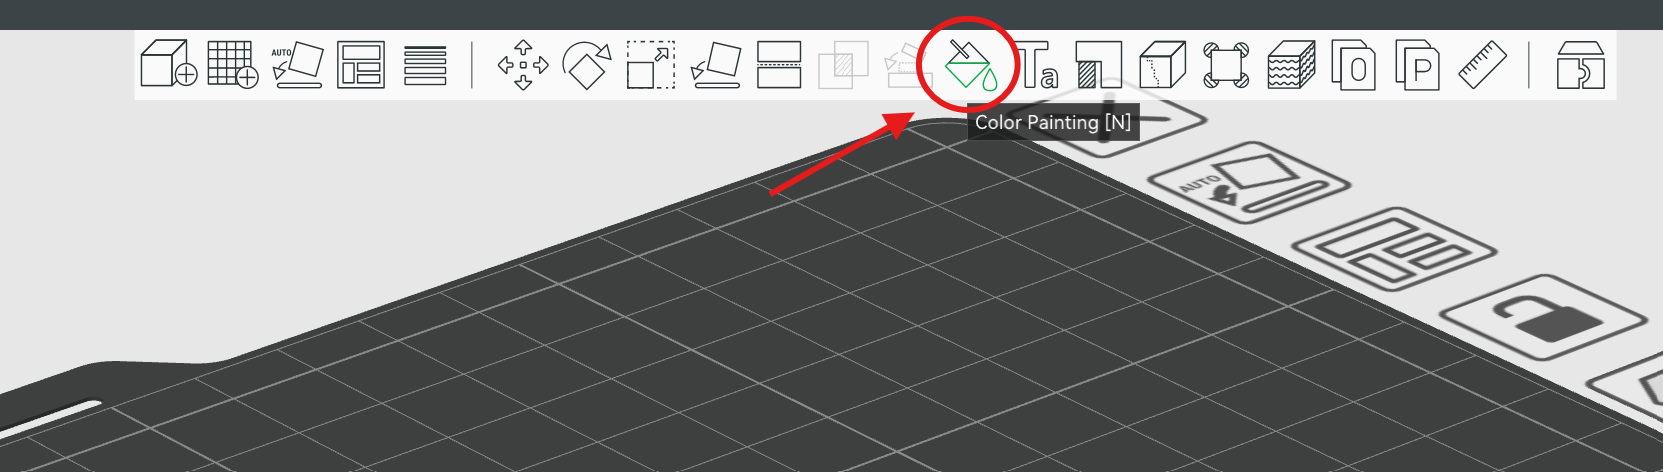
Click "Color Painting" icon in the tool bar.
After clicking the icon, there will be different tools to color the design. First, select respected color and then the tool type.
Prime Tower & Purging: Because the printer uses a single nozzle to print multiple colors, it must clear out the previous color before starting a new one.
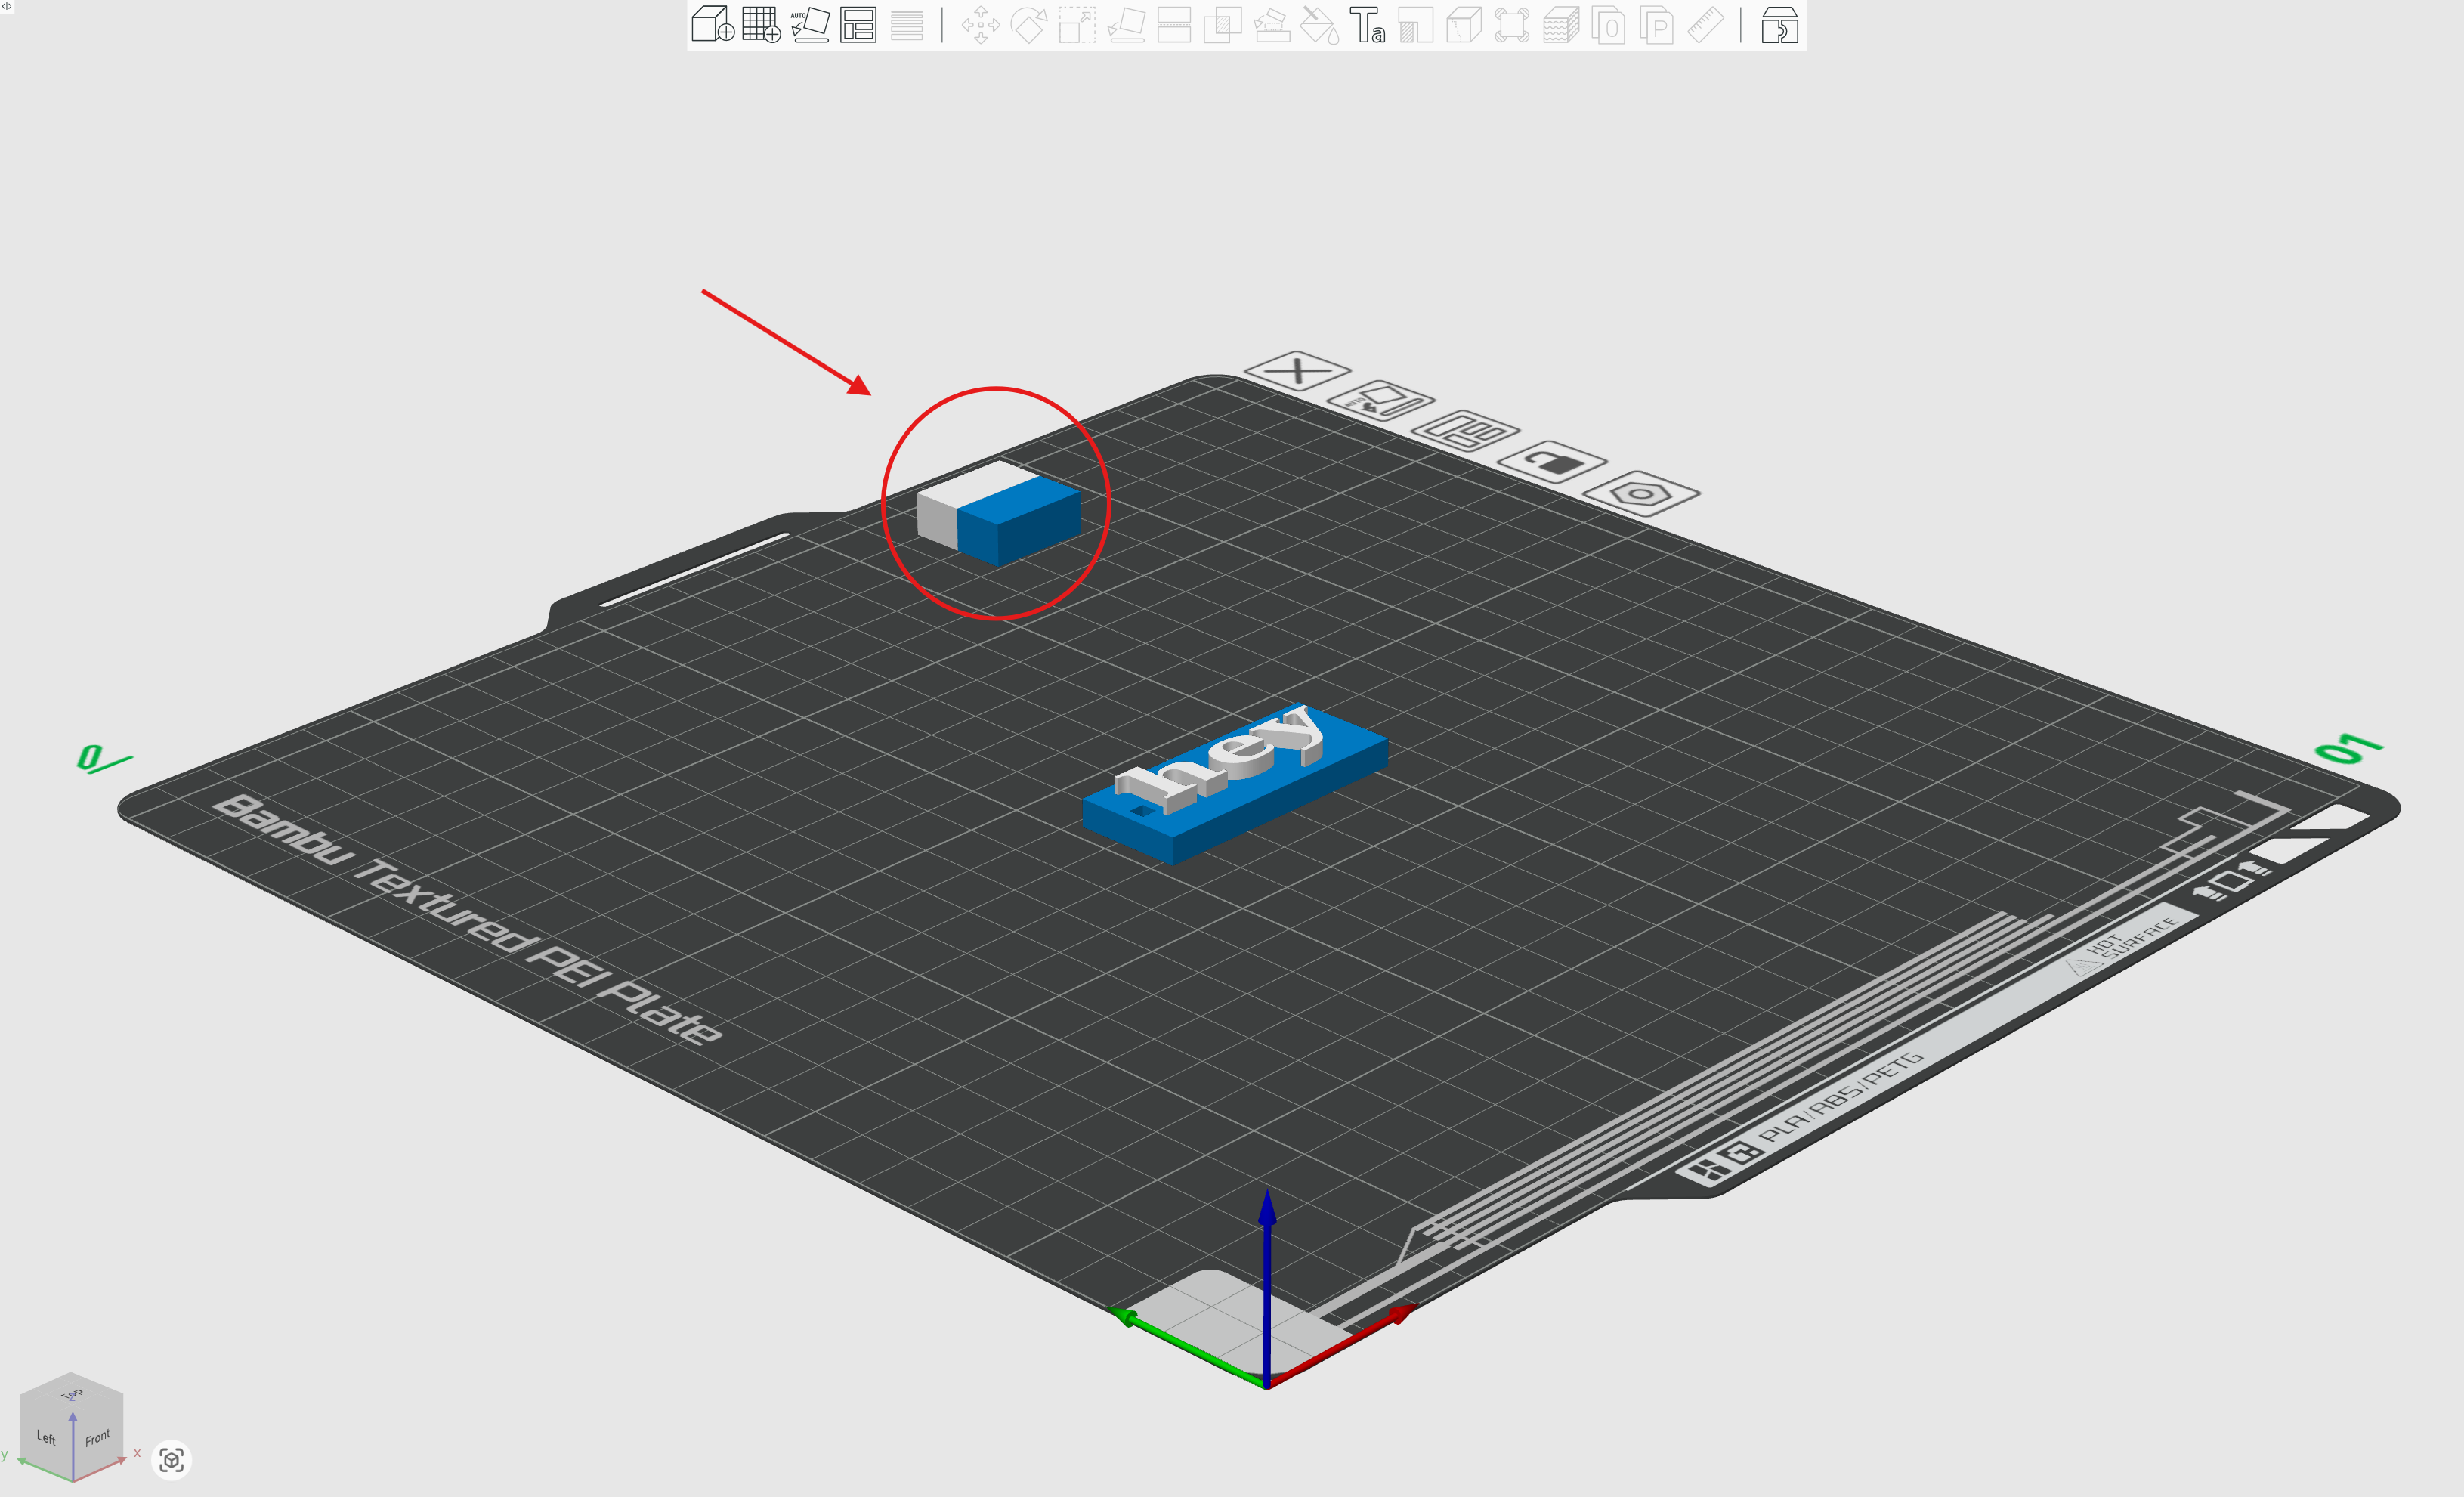
- Prime Tower: Bambu Studio automatically generates a small square tower on the build plate. The nozzle prints a bit on this tower after a color swap to stabilize nozzle pressure and prevent dark colors from bleeding into light colors.
- Flushing: Leftover filament is automatically flushed into the waste chute behind the printer during swaps.
The "Prime Tower" can be seen below. ⬇️
💡Efficiency Tip: Swapping colors takes time and uses extra filament. To keep print times fast and waste low, try to limit color changes across vertical layers (Z-height).