Module 4: Export and Slicing
| Site: | OpenMoodle der Universität Bielefeld |
| Course: | BITS SPACE – 3D Printing & Modelling |
| Book: | Module 4: Export and Slicing |
| Printed by: | Gast |
| Date: | Friday, 20 November 2026, 10:05 PM |
1. The Function of a Slicer
A slicer is the bridge between digital 3D design and physical manufacturing. It converts 3D model files (such as STL, OBJ, or STEP) into G-code which is machine-readable instructions that tell the 3D printer precise toolpaths, speeds, temperatures, and layer-by-layer extrusion coordinates.
While popular open-source and proprietary slicers include PrusaSlicer, Cura, and OrcaSlicer, this course utilizes Bambu Studio as our primary slicing environment. Bambu Studio provides fine-grained control over internal geometry, build-plate placement, multi-material settings, and machine kinematics.
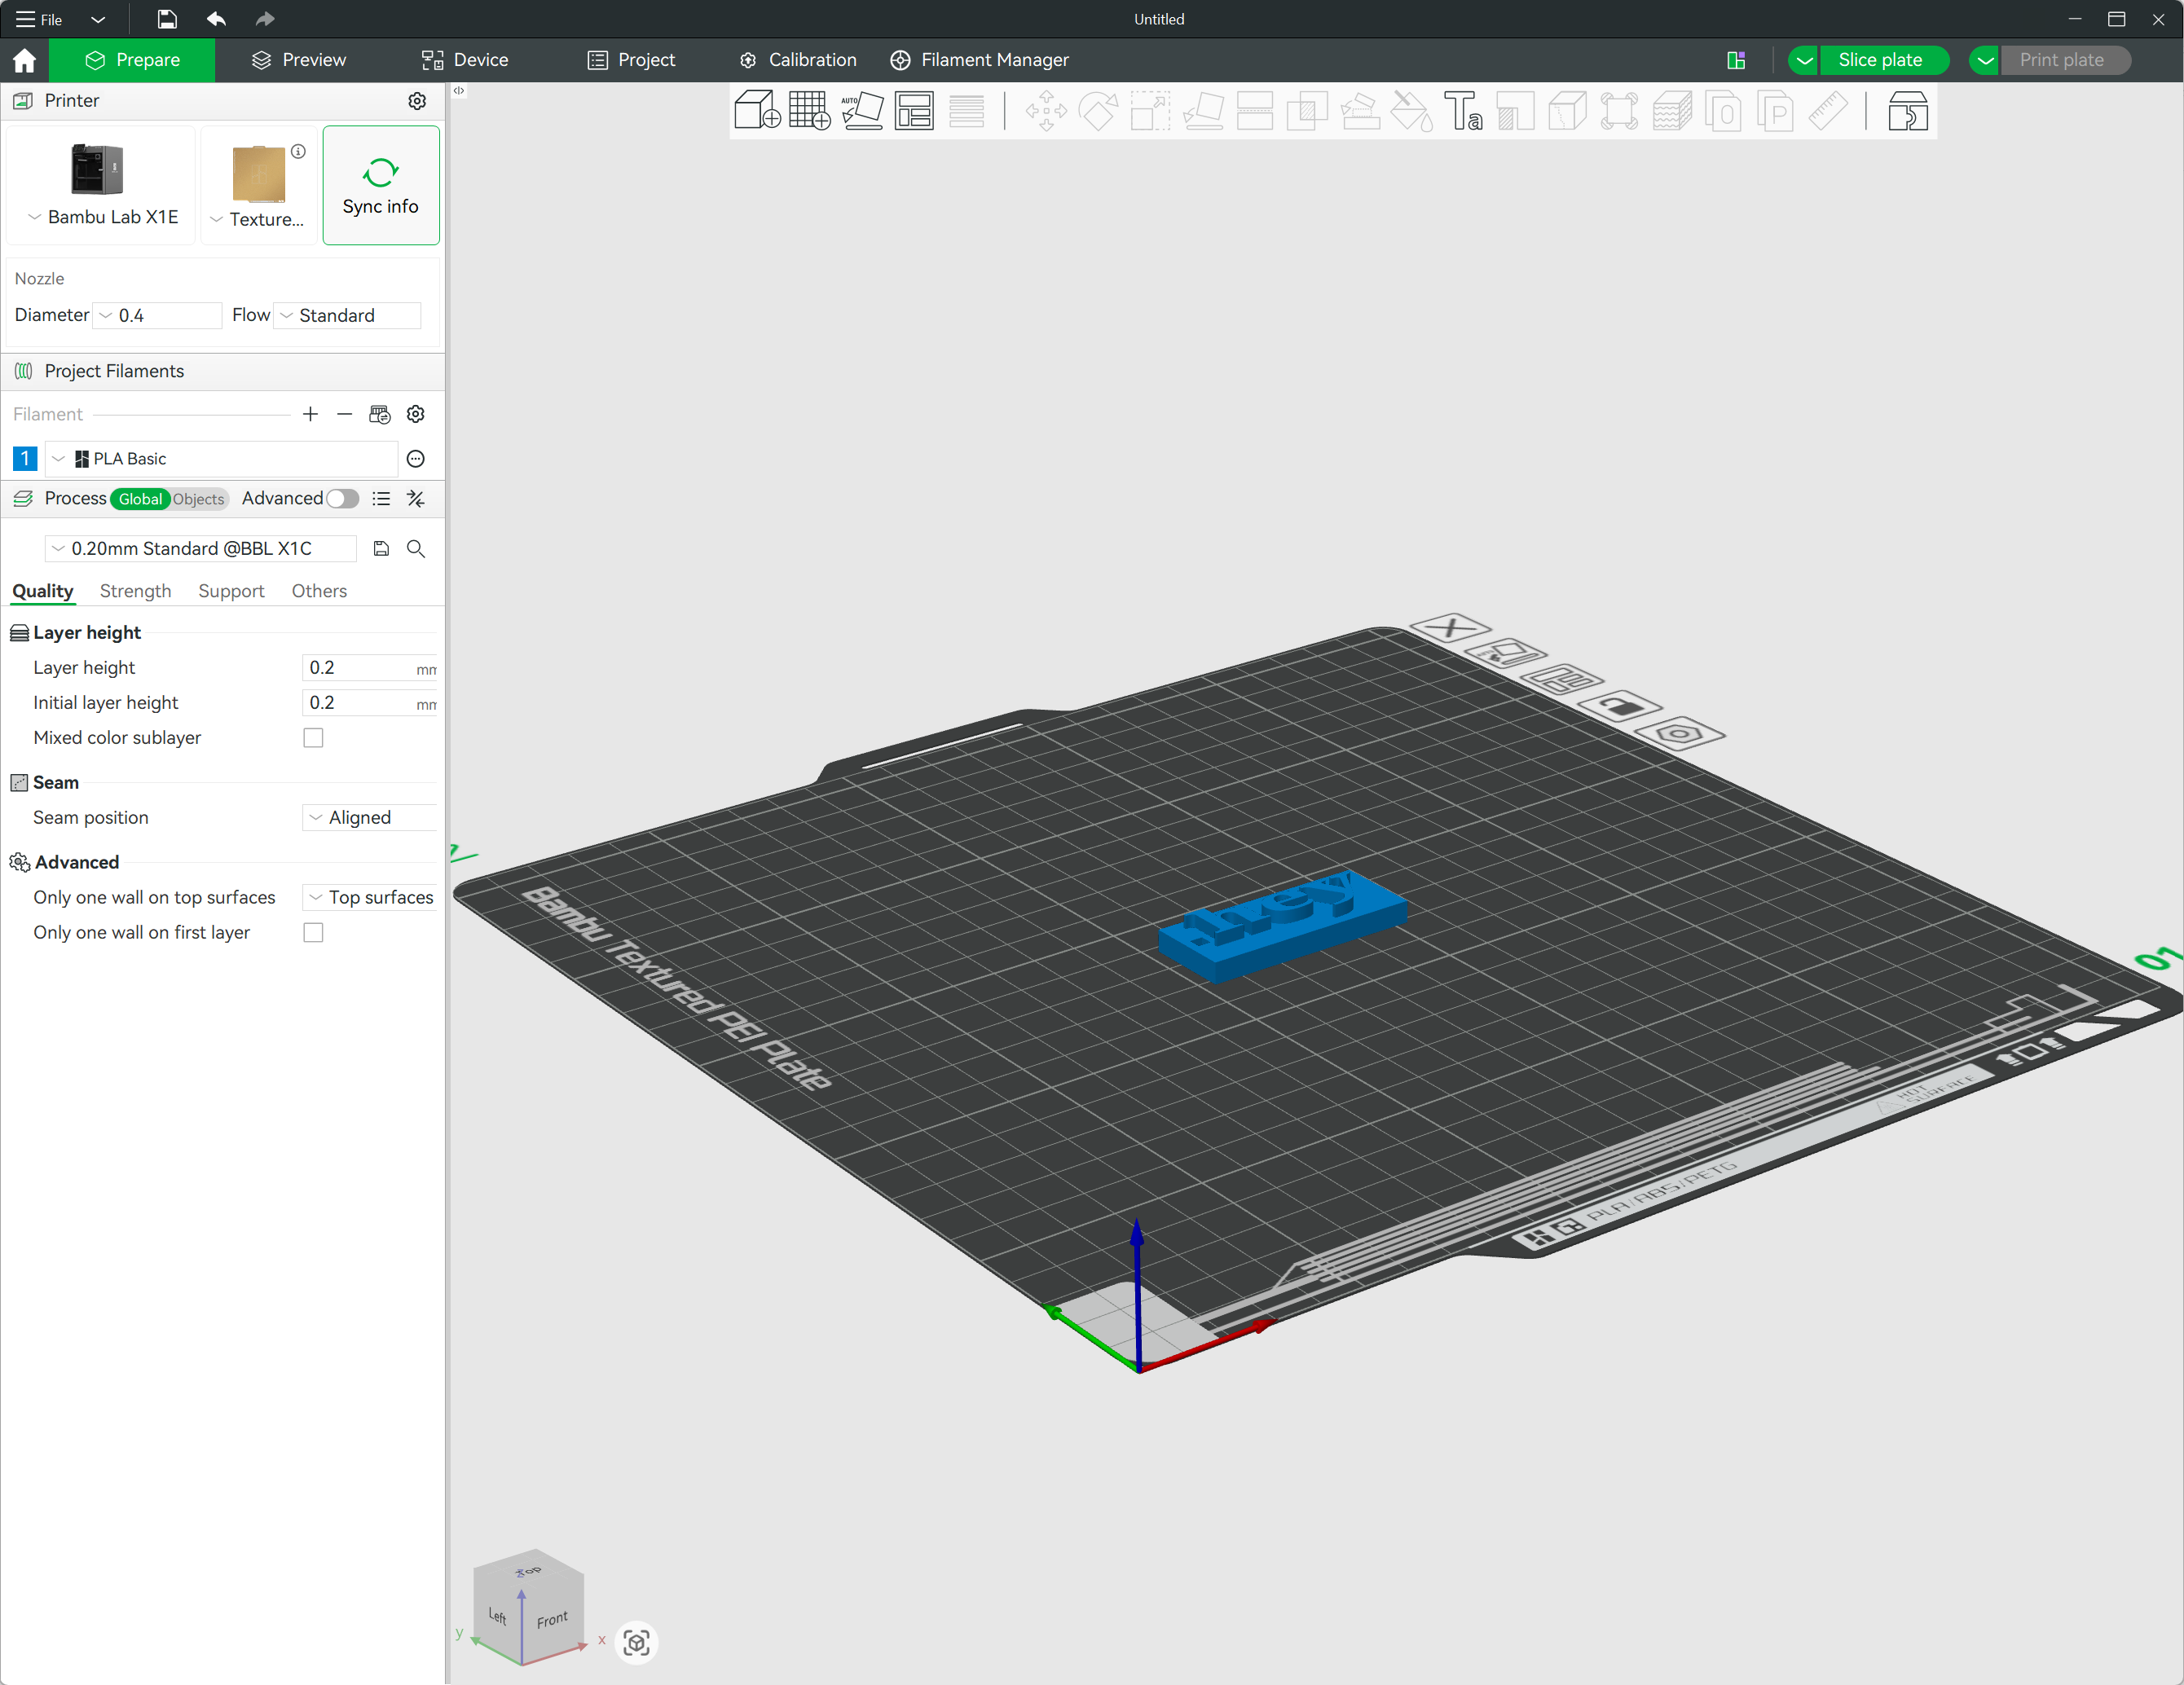
As a first step drag the .stl file and drop into the Bambu Studio. After importing the design into Bambu Studio, it will look like below. Select the correct 3D printer in the upper left corner as "Bambu Lab X1E" and the plate as "Textured PEI Plate". ⬇️
2. Orientation and Efficiency
The orientation of an object on the build plate significantly impacts print time, material usage and structural strength.
Material Optimization: Placing an object in an optimal orientation can reduce the amount of filament used by minimizing the need for support structures.
Surface Quality: Flat surfaces should generally be placed against the build plate to ensure better adhesion and a cleaner finish.
Strength: Because prints are weaker along the layer lines, the orientation should be chosen based on the direction of any mechanical stress the part will encounter.
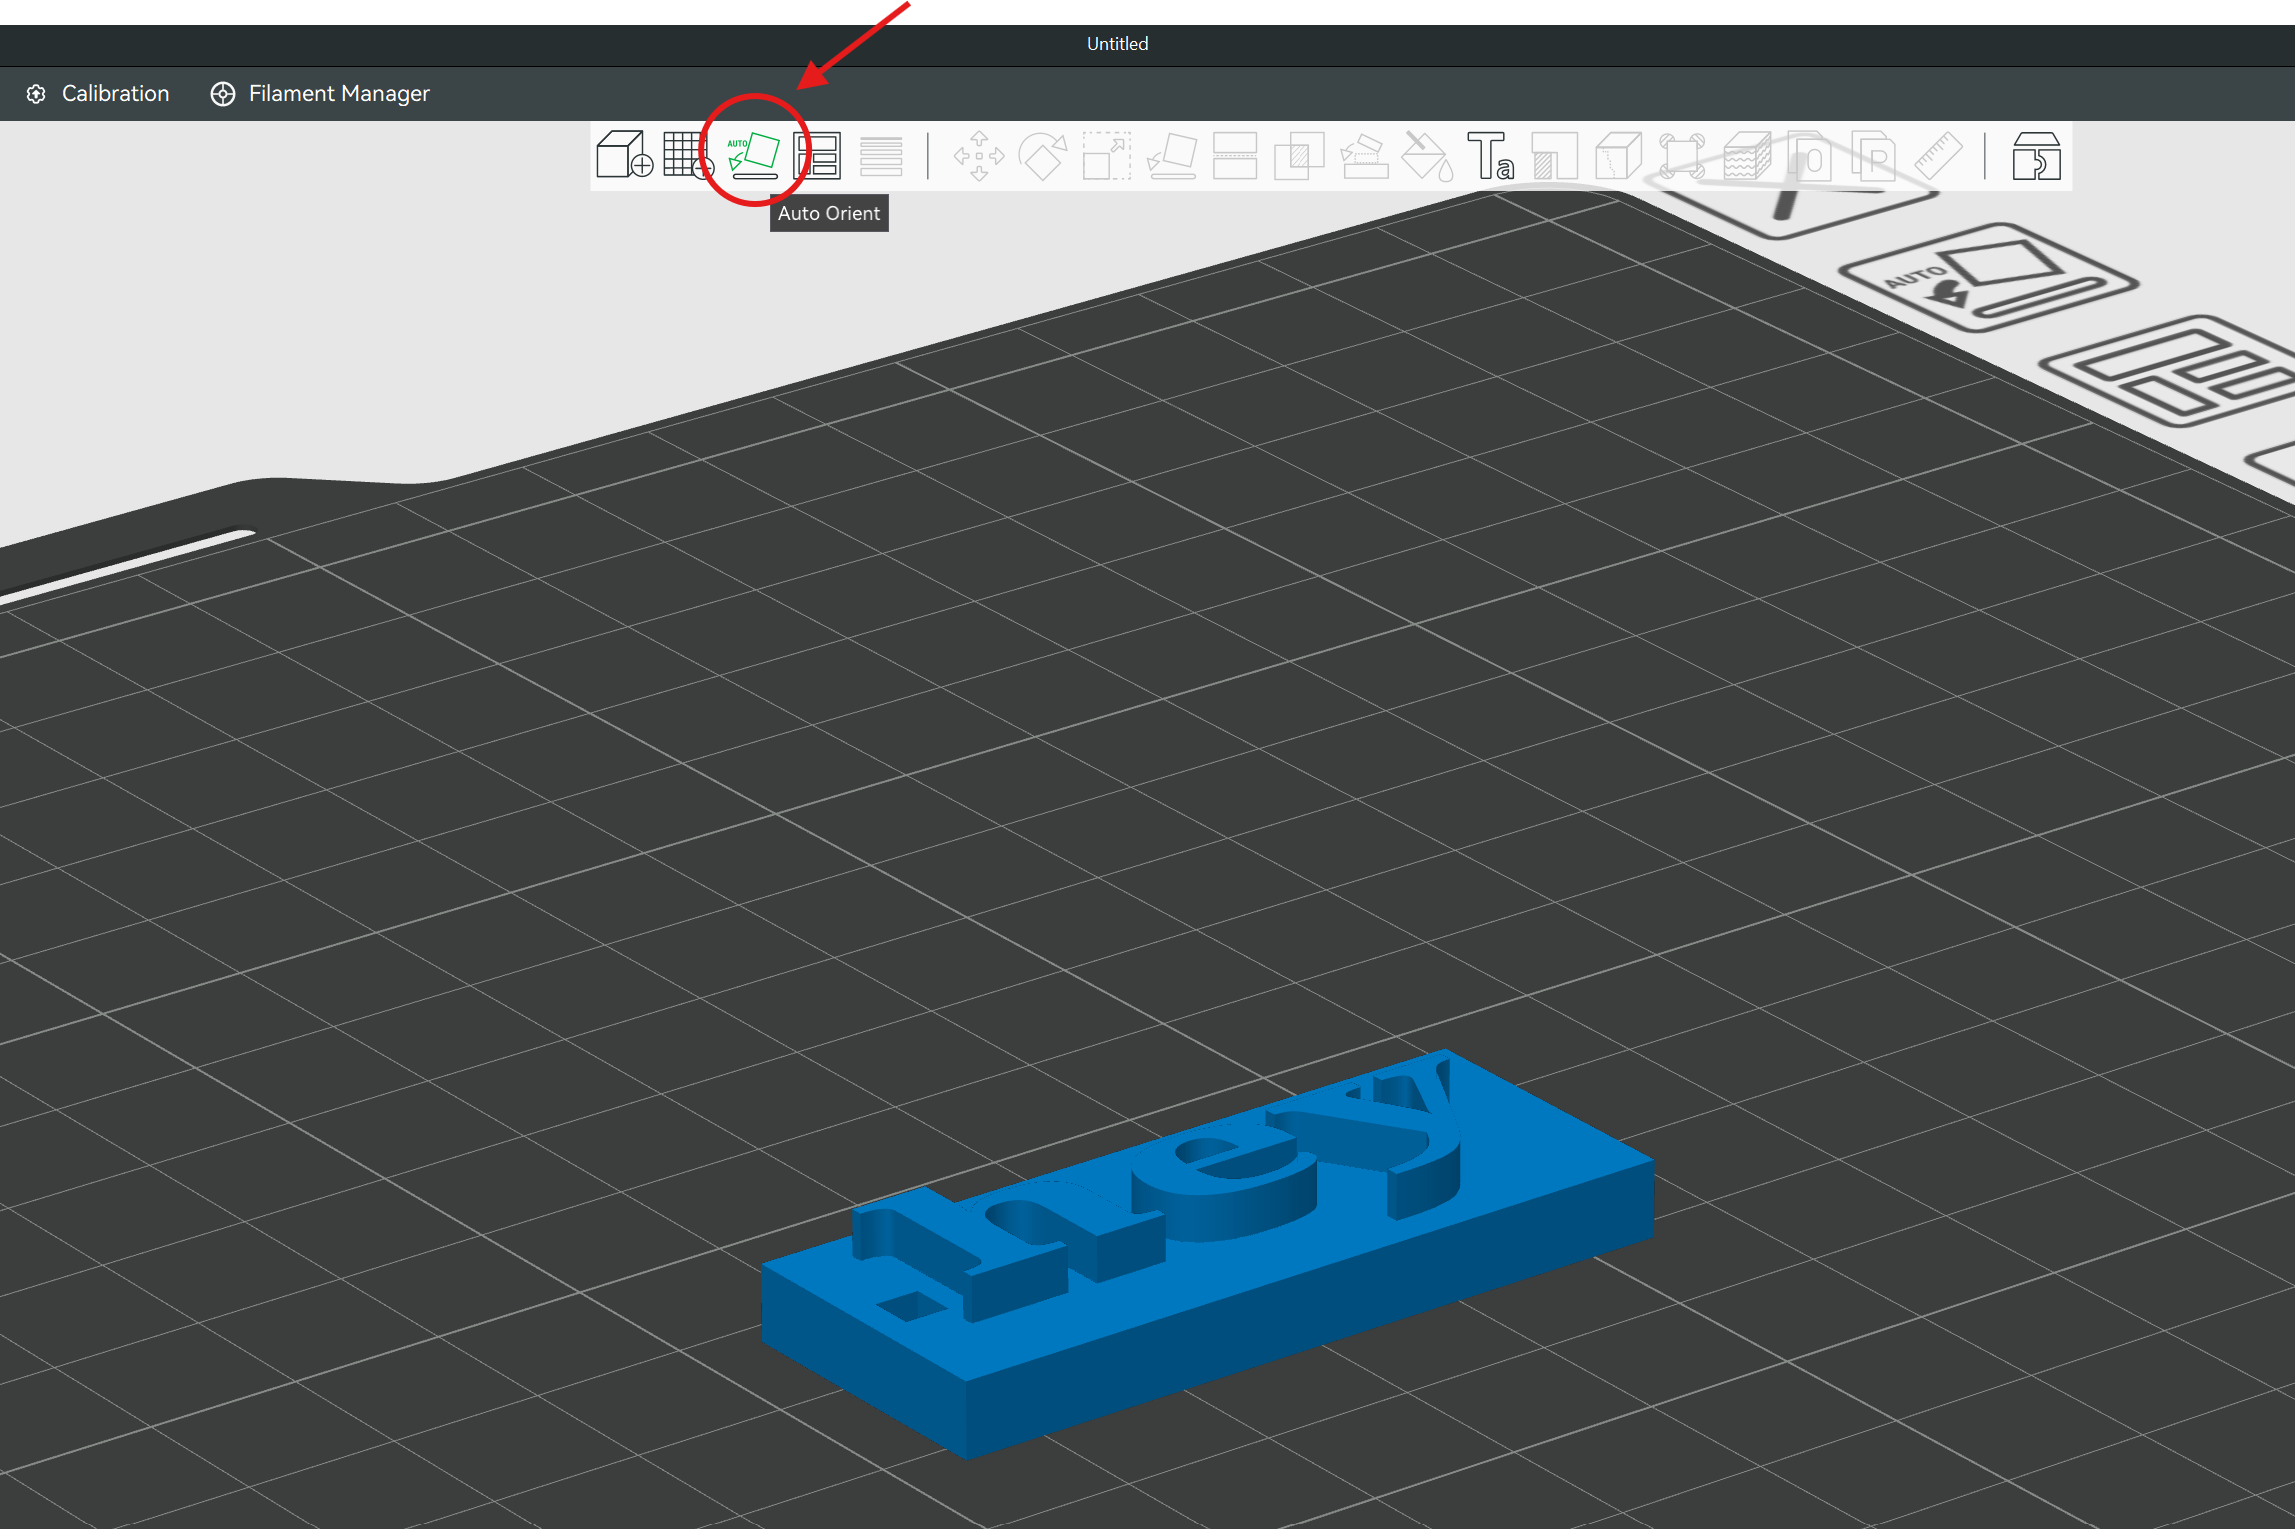
There is a feature in Bambu Studio that allow automatic orientation. Click to the "Auto Orient" icon in the tool bar located on top to make the suitable orientation for the design.
3. Standard Slicing Parameters
To maintain consistency, specific default settings are utilized.
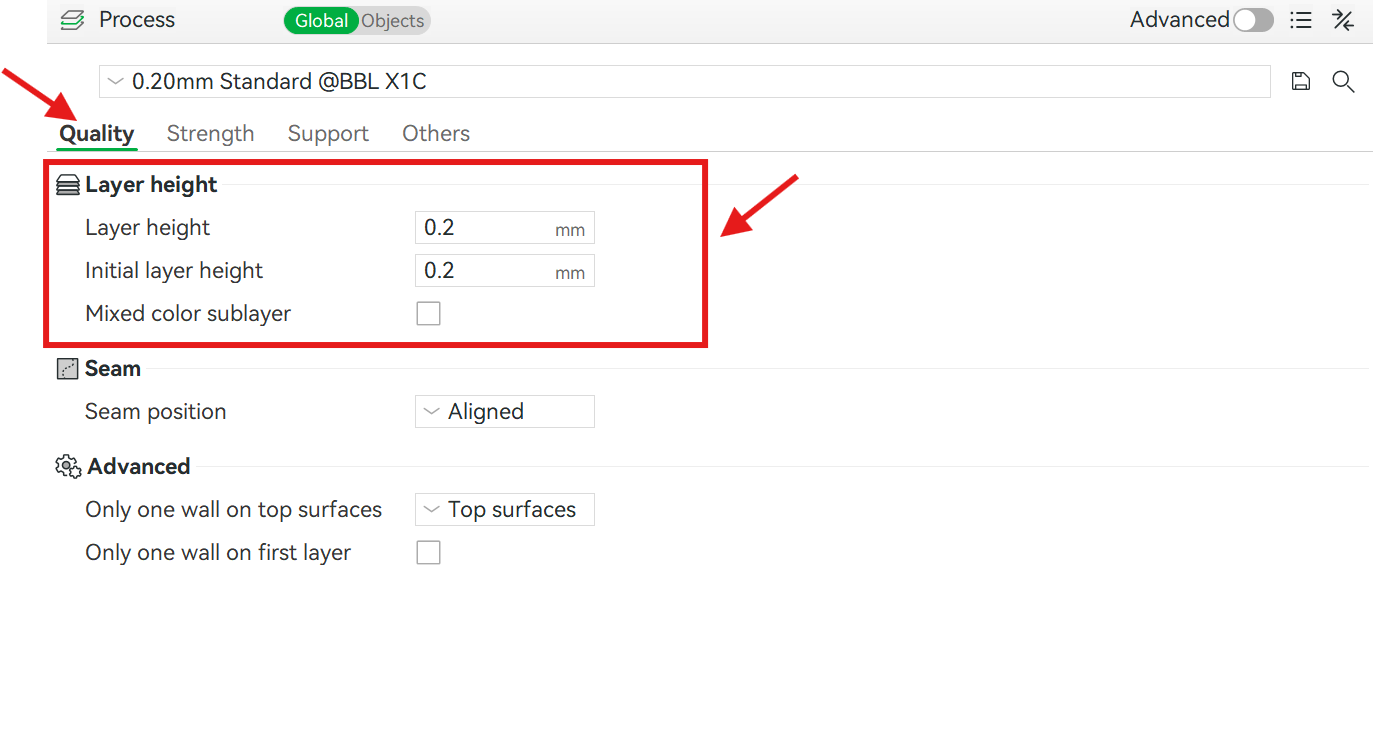
Layer height: This is set to 0.2 mm by default. This provides a balance between visual quality and printing speed.
Under the Quality tab located on left column of the screen, layer properties can be adjusted according to needs. ⬇️
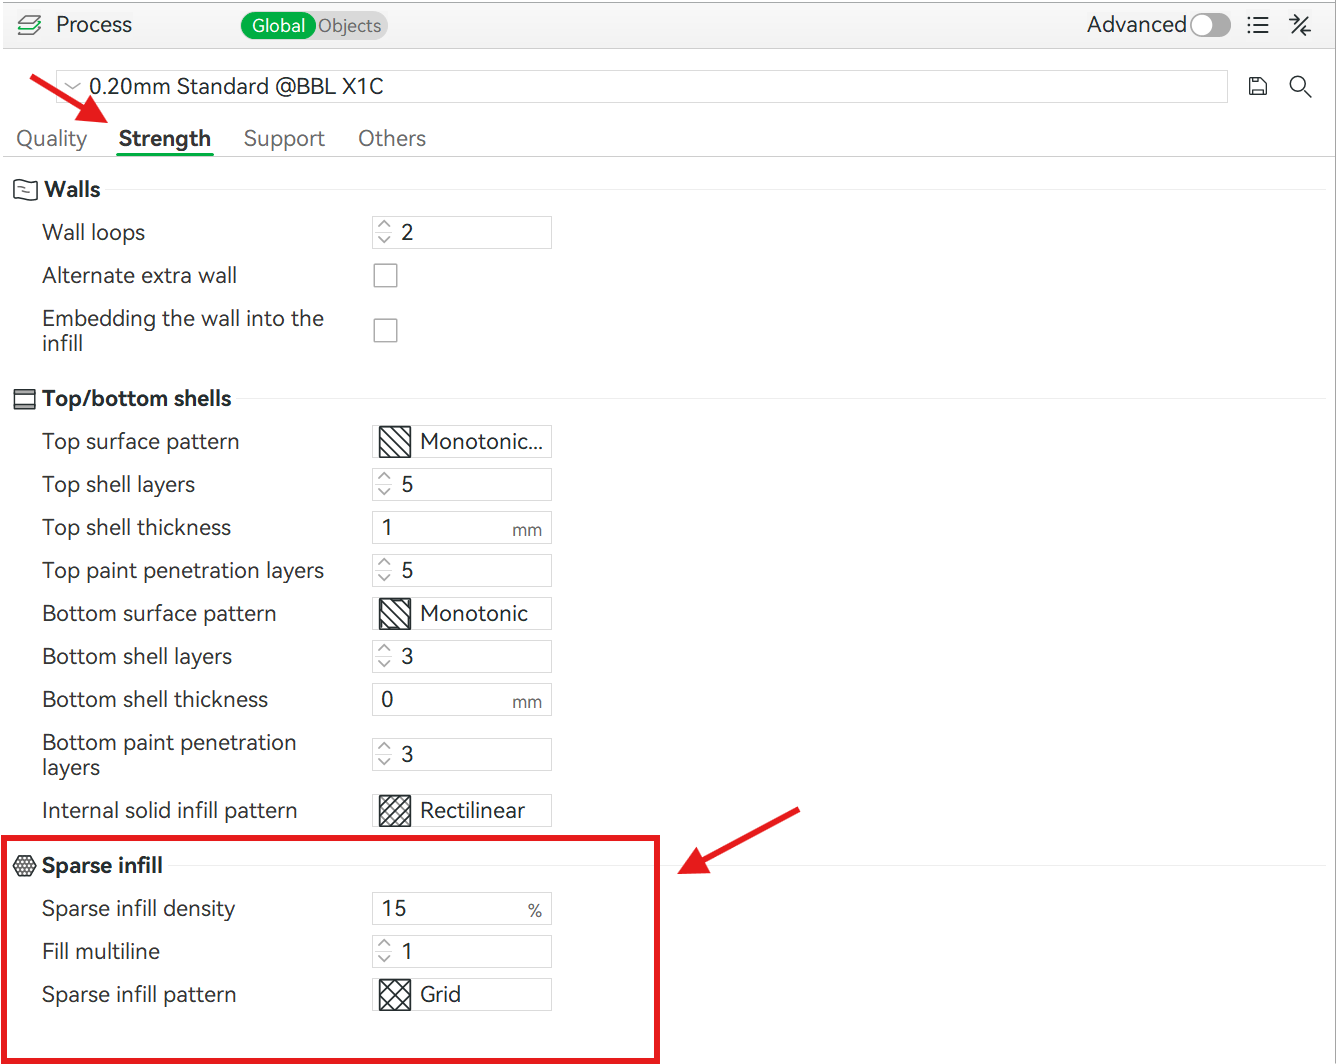
Infill Settings (Density & Patterns): For standard models, infill density is typically set between 15% and 20% to balance print speed and material usage.
Choosing the right pattern is key to performance: Gyroid is widely recommended for functional parts because it provides equal, omnidirectional strength and a high strength-to-weight ratio, while patterns like Grid or Cubic are ideal for rapid prototyping where printing speed is prioritized.
For parts subjected to heavy mechanical loads or requiring high durability, increase the infill density to 40%+ or add extra perimeter wall loops.
Under the Strength tab located on left column, infill density and pattern can be adjusted. ⬇️
4. Support Structures
Supports are temporary scaffolds generated by the slicer to hold up overhangs or floating parts.
Purpose: They prevent plastic from drooping when printing angles steeper than 45°.
Removal: Supports are designed to be broken away after the print is complete.
Minimization: Effective design and orientation should be prioritized to reduce the reliance on supports, as they increase both print time and filament waste.
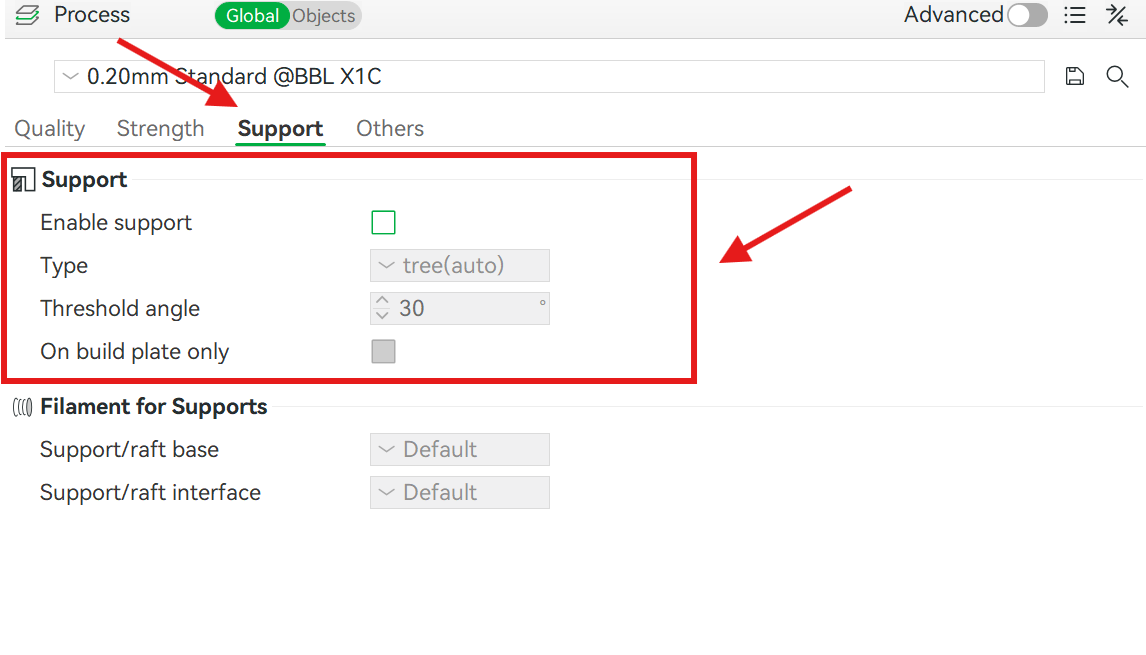
Under the Support tab located on left column, enable the support structure by checking the green box. The threshold angle and support type can be adjusted according to needs. ⬇️
5. Multi-Color Painting
When using a multi-color system like the Bambu AMS (Automatic Material System), you must color your design before slicing so the software can map out the filament swaps, purge blocks, and layer instructions.
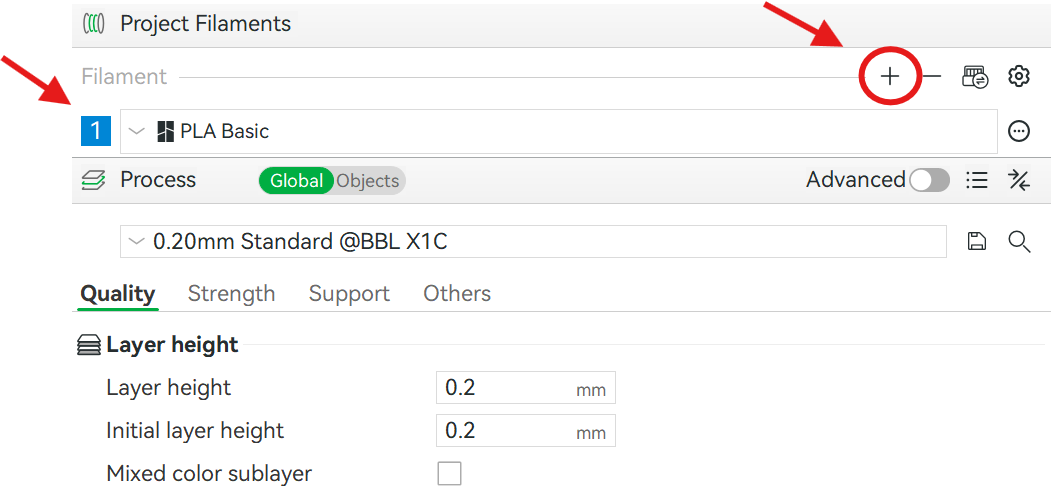
Match Your Filament Slots: In Bambu Studio’s left sidebar, set your virtual filament slots (1, 2, 3, 4) to match the exact colors currently loaded in your physical AMS.
Click "+" sign located on left column under the "Project Filaments" to add new filament color. After adding the required colors, color and type of the filament can be adjusted accordingly.
Paint the Model: Select your 3D model and press N (or click the Color Paint tool icon on the top toolbar) to open the painting tools:
- Fill Tool: Fills an entire distinct face or section with color in one click.
- Paintbrush / Sphere: Lets you freehand paint details directly onto flat or curved surfaces.
- Height Range: Colors an entire horizontal band along the Z-axis (ideal for layered color bases or stacked logos).
Click "Color Painting" icon in the tool bar.
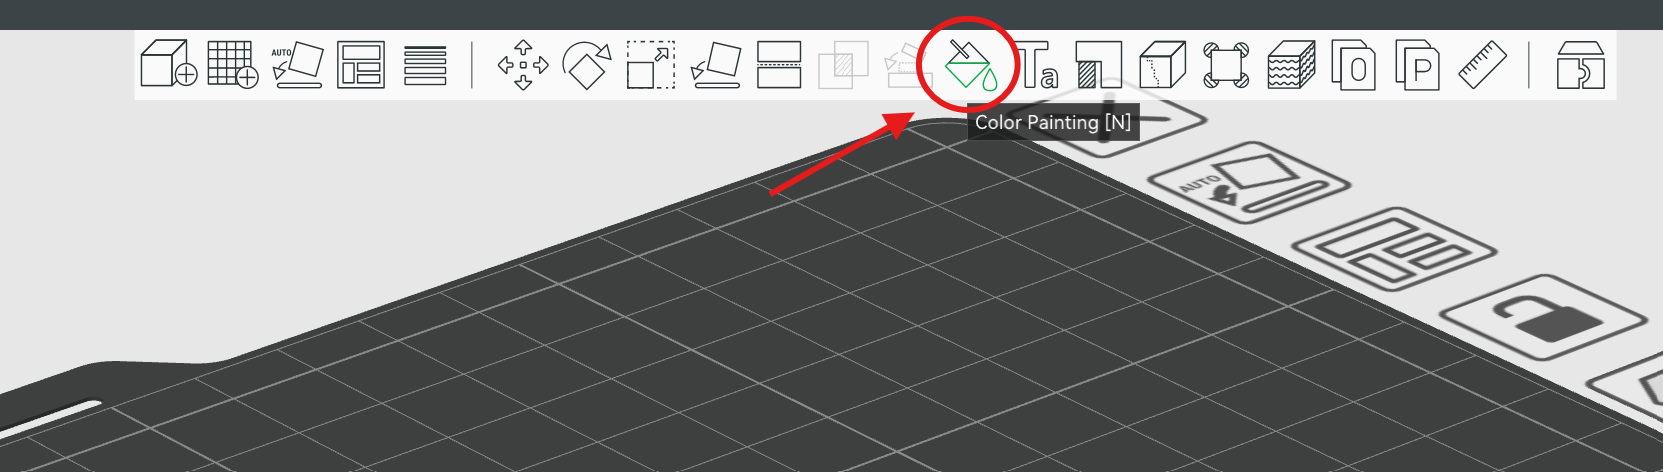
After clicking the icon, there will be different tools to color the design. First, select respected color and then the tool type.
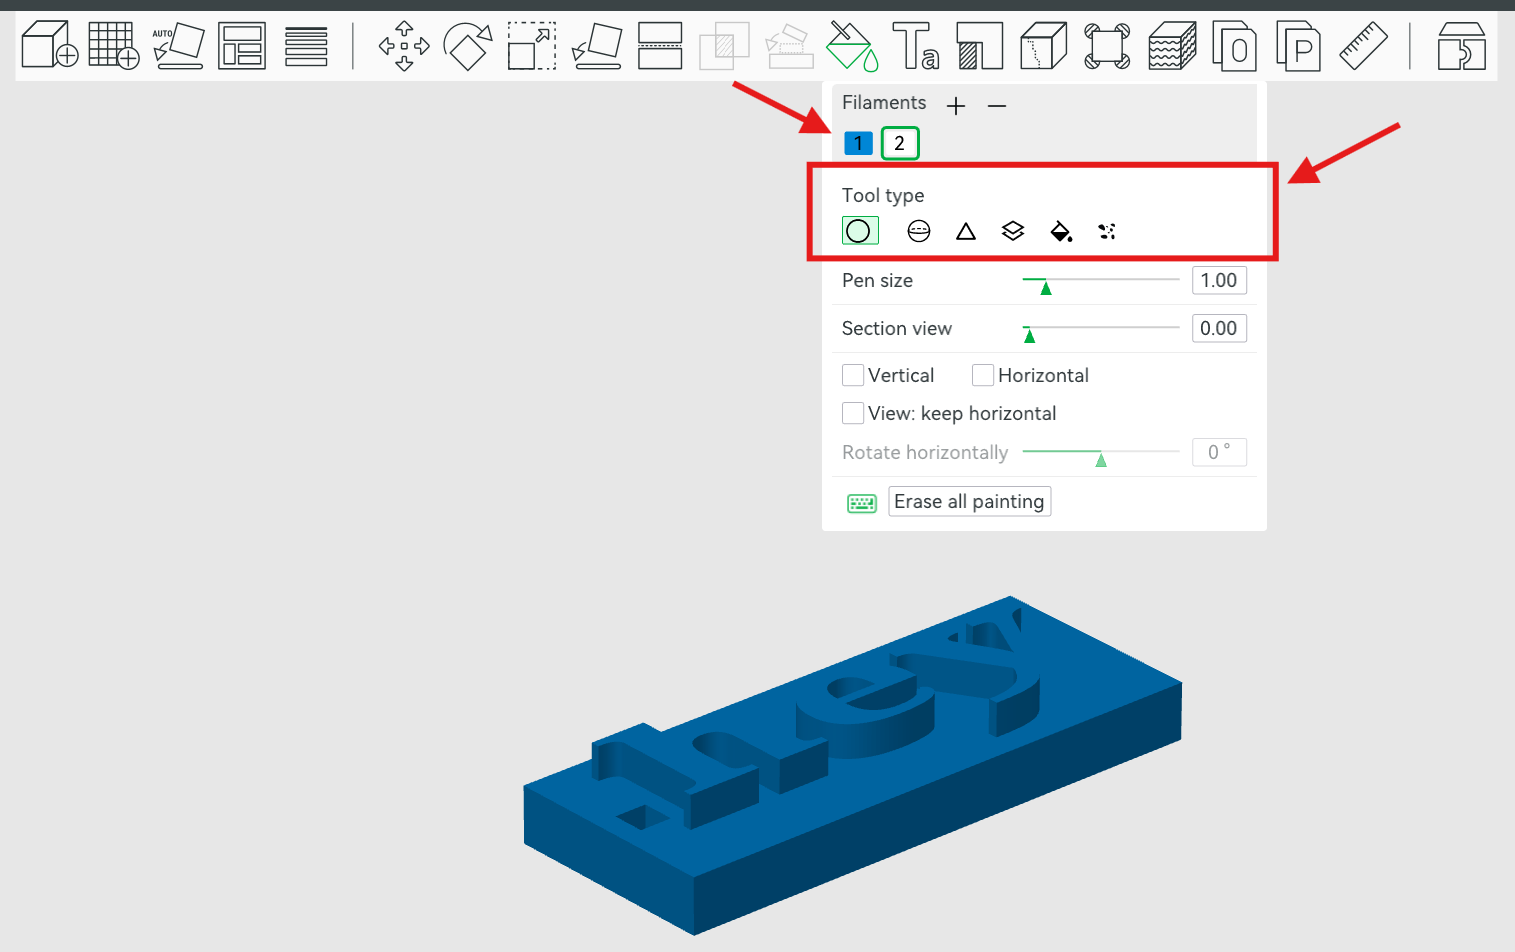
Prime Tower & Purging: Because the printer uses a single nozzle to print multiple colors, it must clear out the previous color before starting a new one.
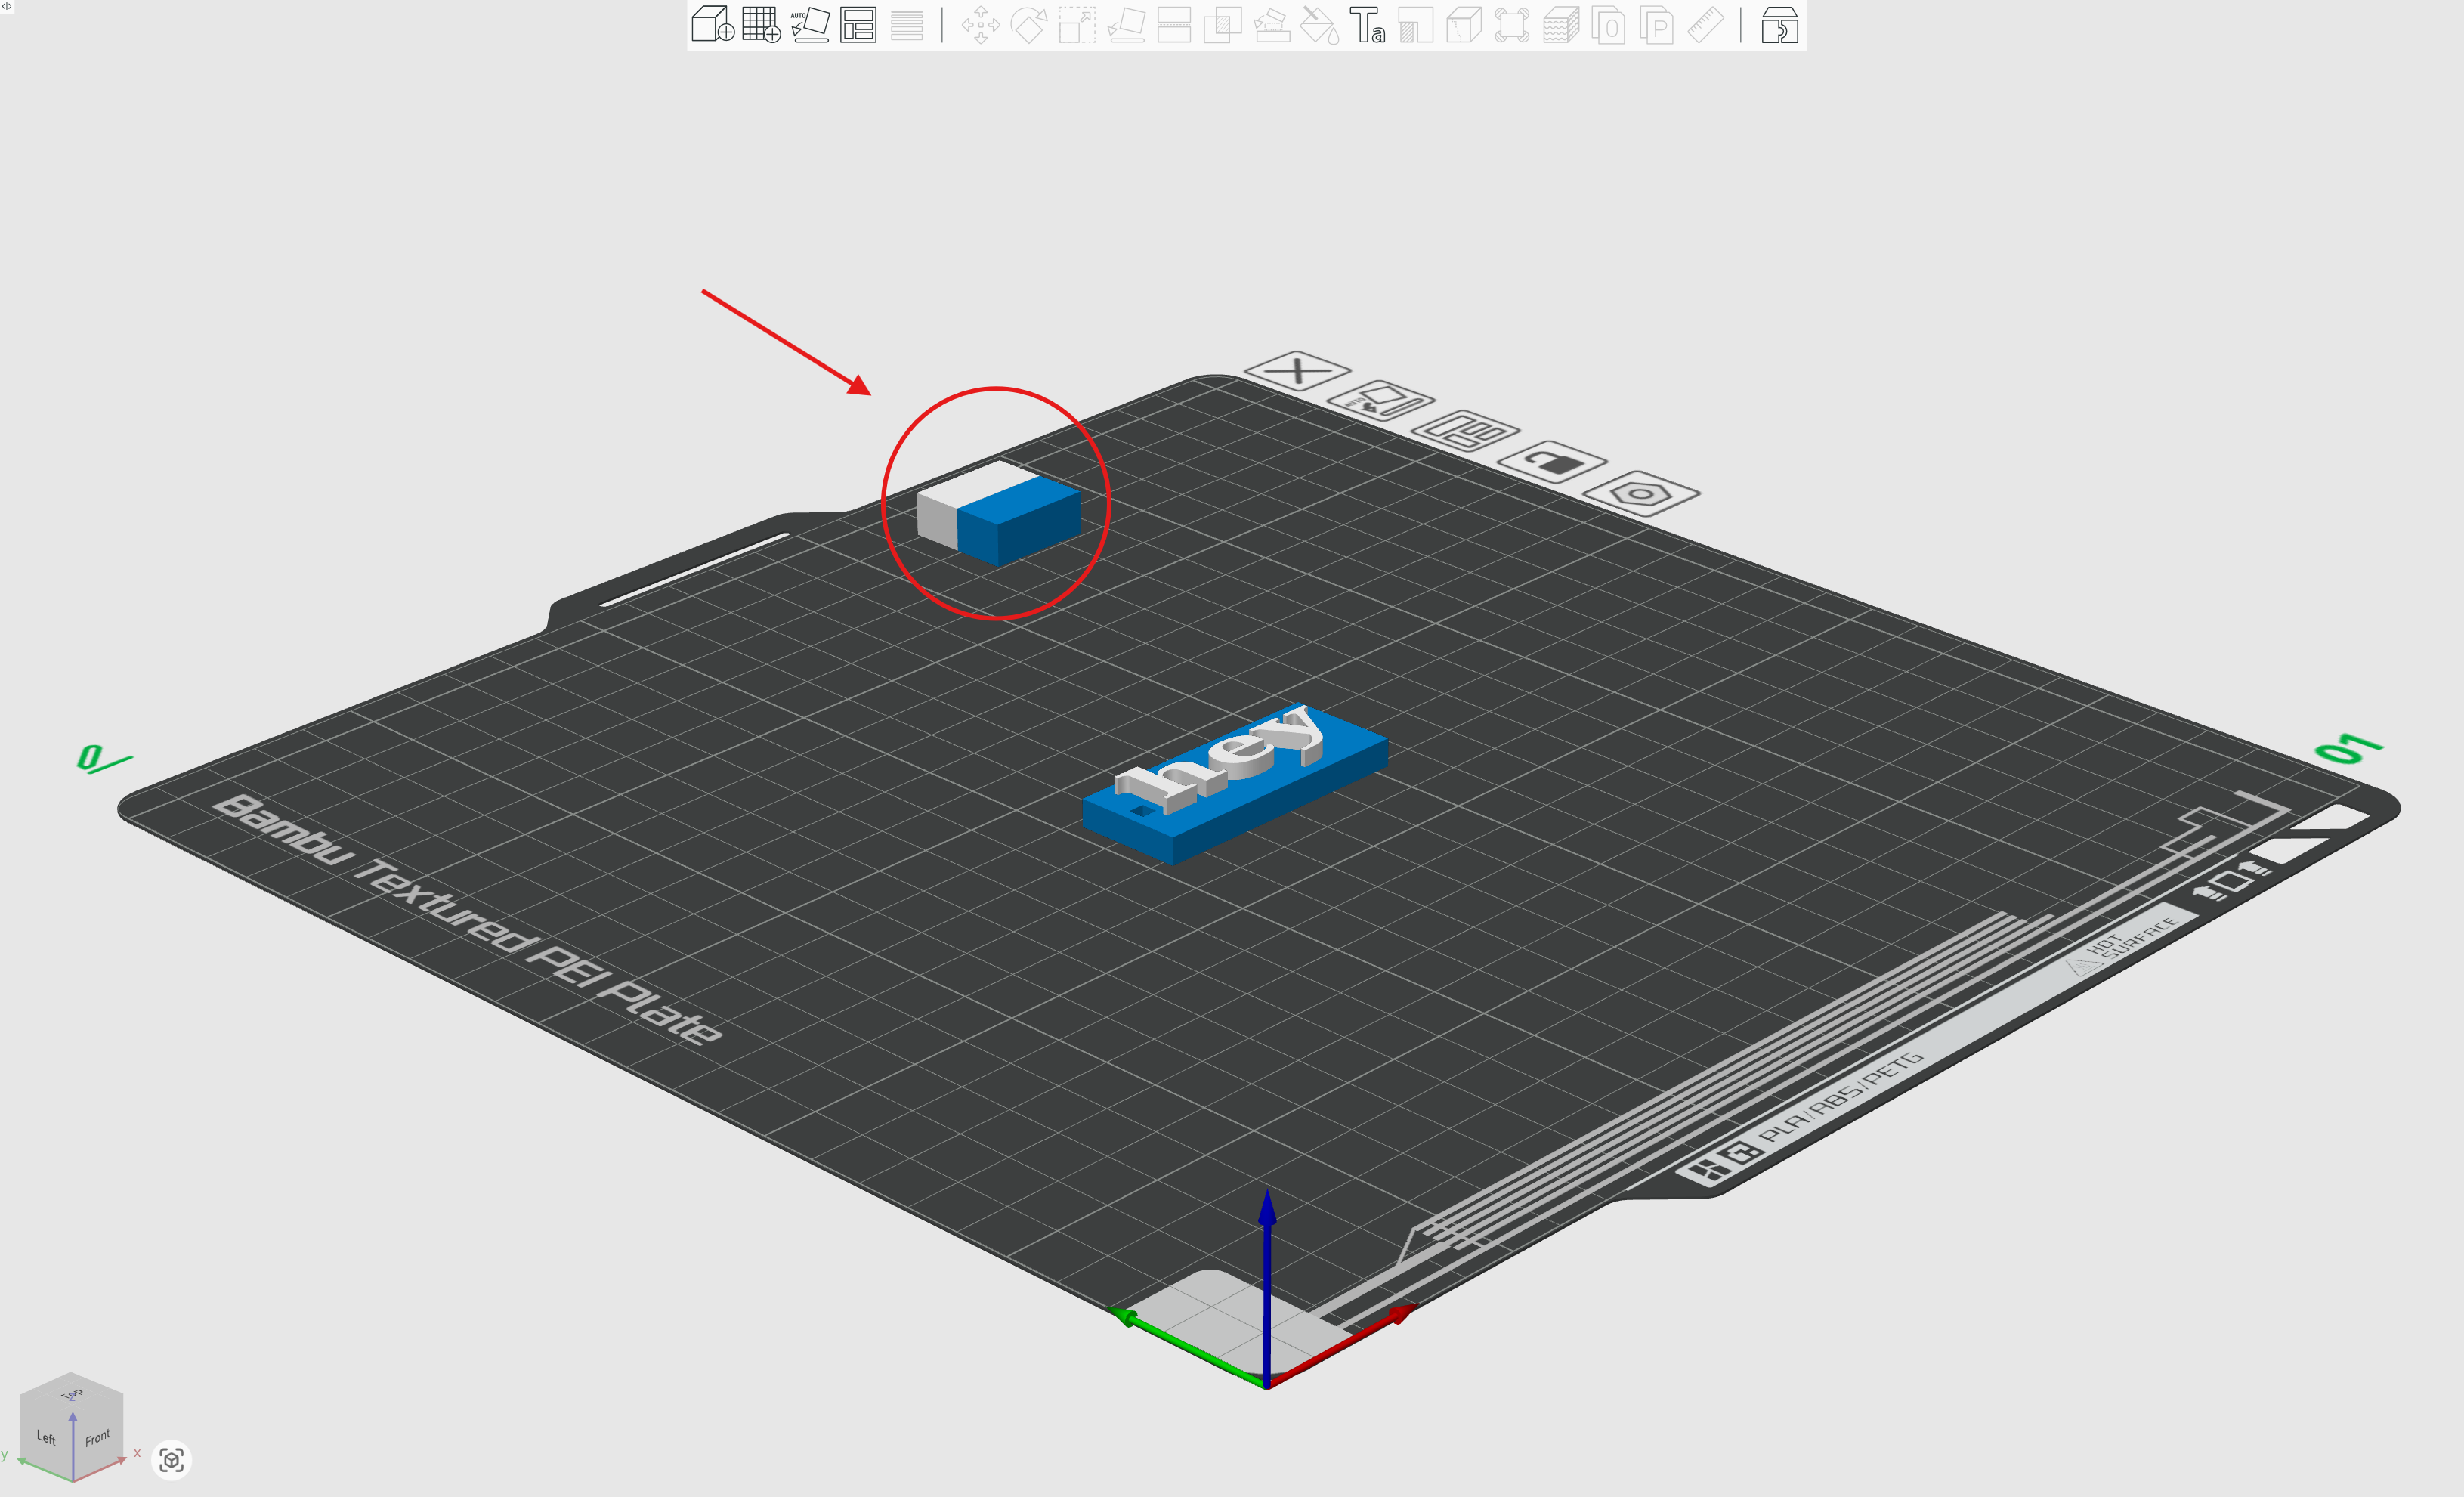
- Prime Tower: Bambu Studio automatically generates a small square tower on the build plate. The nozzle prints a bit on this tower after a color swap to stabilize nozzle pressure and prevent dark colors from bleeding into light colors.
- Flushing: Leftover filament is automatically flushed into the waste chute behind the printer during swaps.
The "Prime Tower" can be seen below. ⬇️
💡Efficiency Tip: Swapping colors takes time and uses extra filament. To keep print times fast and waste low, try to limit color changes across vertical layers (Z-height).
6. Print Preview and Data Estimation
Before printing, the Print Preview should be analysed to identify potential errors or failures.
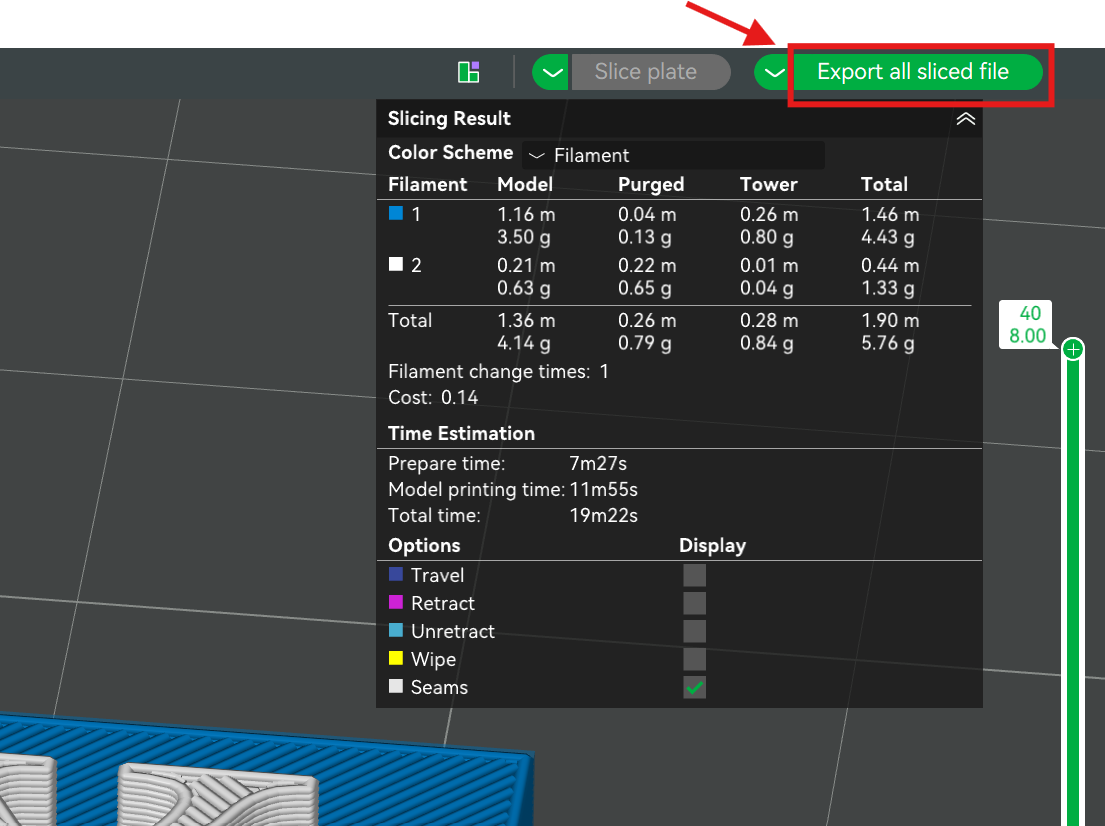
After finishing the coloring and other settings, click "Slice plate" button at top right.

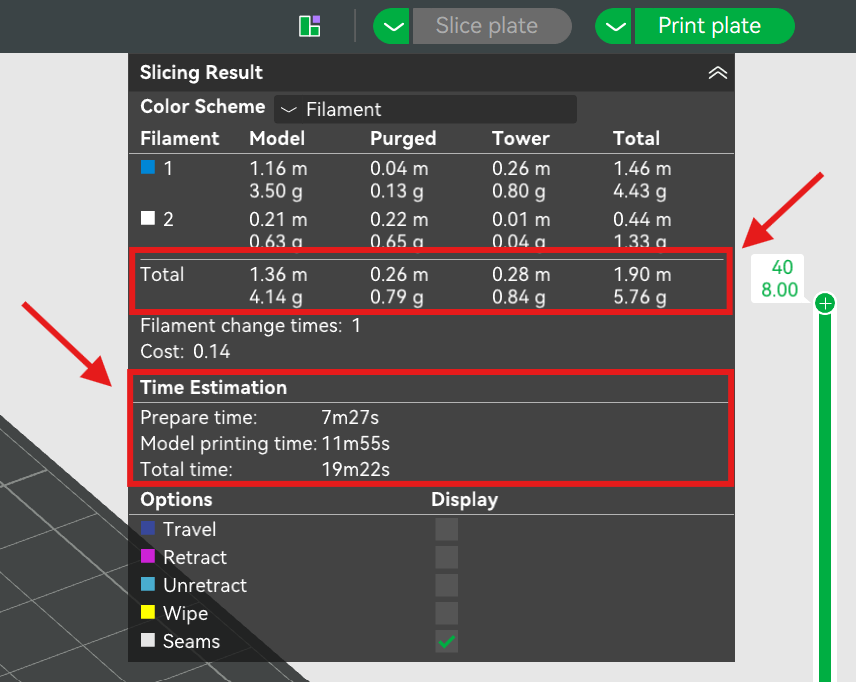
Estimated Print Time: The total duration required to complete the print.
Filament Usage (g): The total weight of the material required.
The Threshold for Filament: According to our policy, if an estimate exceeds 600 g of filament, you are welcome to use the printers but you are responsible for purchasing the material.
All the information about the estimated time and weight can be found in slicing result. ⬇️
7. Exporting the Sliced Files
Once you have verified the slice preview and confirmed no errors or unsupported islands exist:
- Locate the green Print Plate button in the top-right corner of Bambu Studio.
- Click the drop-down arrow next to Print Plate.
- Select Export sliced file (or Export G-code/3MF for SD card).
- Save the generated .gcode / .gcode.3mf file to your USB drive or SD card to load directly onto the machine.
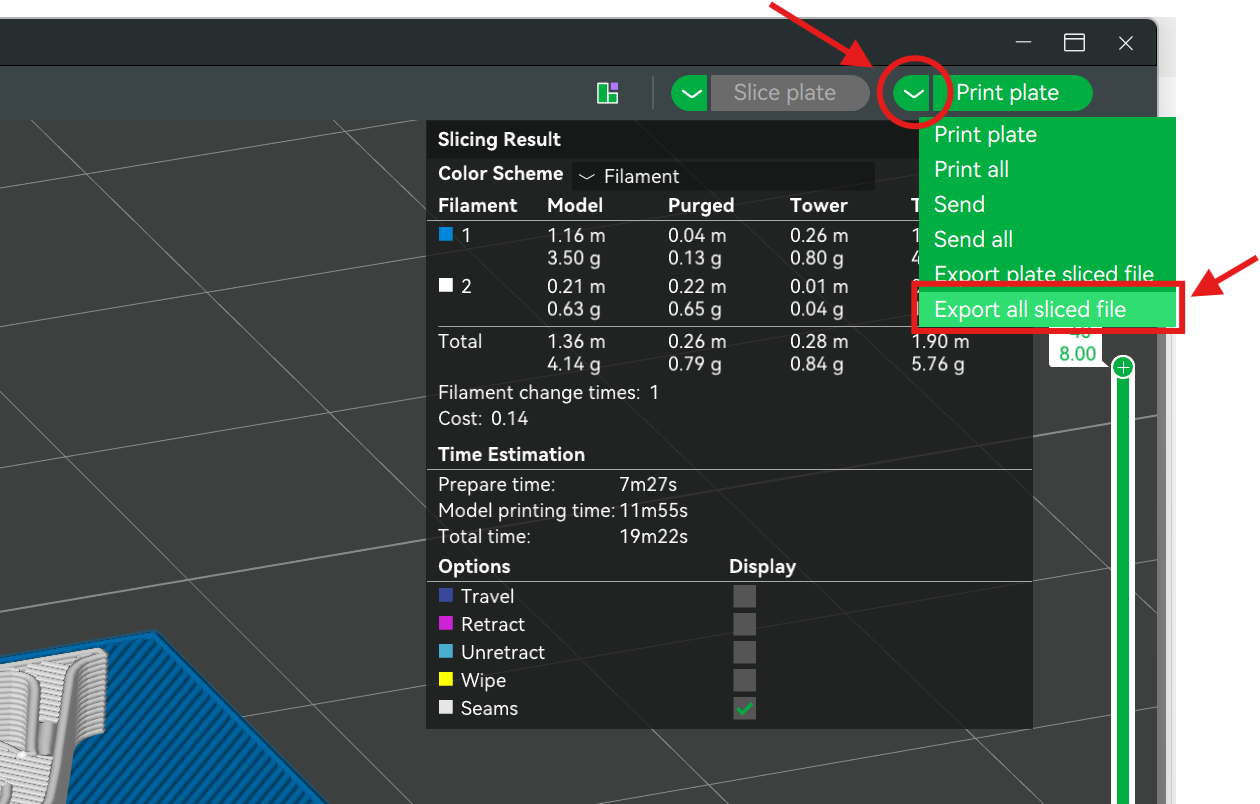
After selecting "Export all sliced file", click the button to export the file.