Module 3: Introduction to 3D Modelling with Tinkercad
2. Shape Manipulation
All models in Tinkercad are created by combining or subtracting primitive shapes.
Adding Shapes: Geometric primitives are selected from the Shape Library located in right column and placed onto the Workplane by dragging.
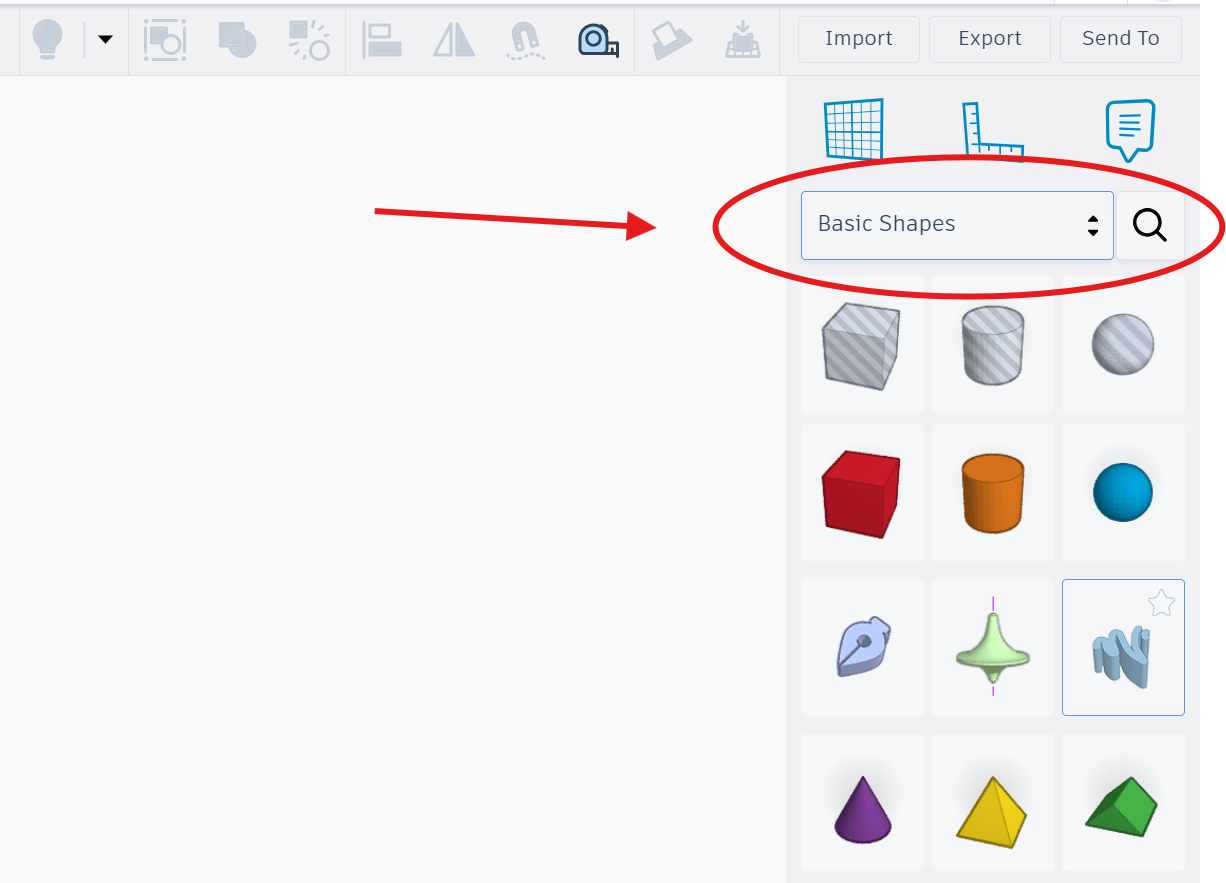
List of features for adding shapes. ⬇️
|
Placing a Shape |
|
|
Open shape panel |
Click the Basic Shapes panel on the right side of the screen |
|
Select a shape |
Left-click the shape you want (e.g. Box, Cylinder, Text) |
|
Place on workplane |
Left-click anywhere on the workplane grid — the shape appears there |
|
Delete a shape |
Click the shape to select it, then press the Delete key |
|
Deselect |
Click on an empty area of the workplane |
Resizing: Shapes are modified using the small squares (handles) that appear when an object is selected. White handles allow for corner scaling, while black handles allow for single axis stretching.
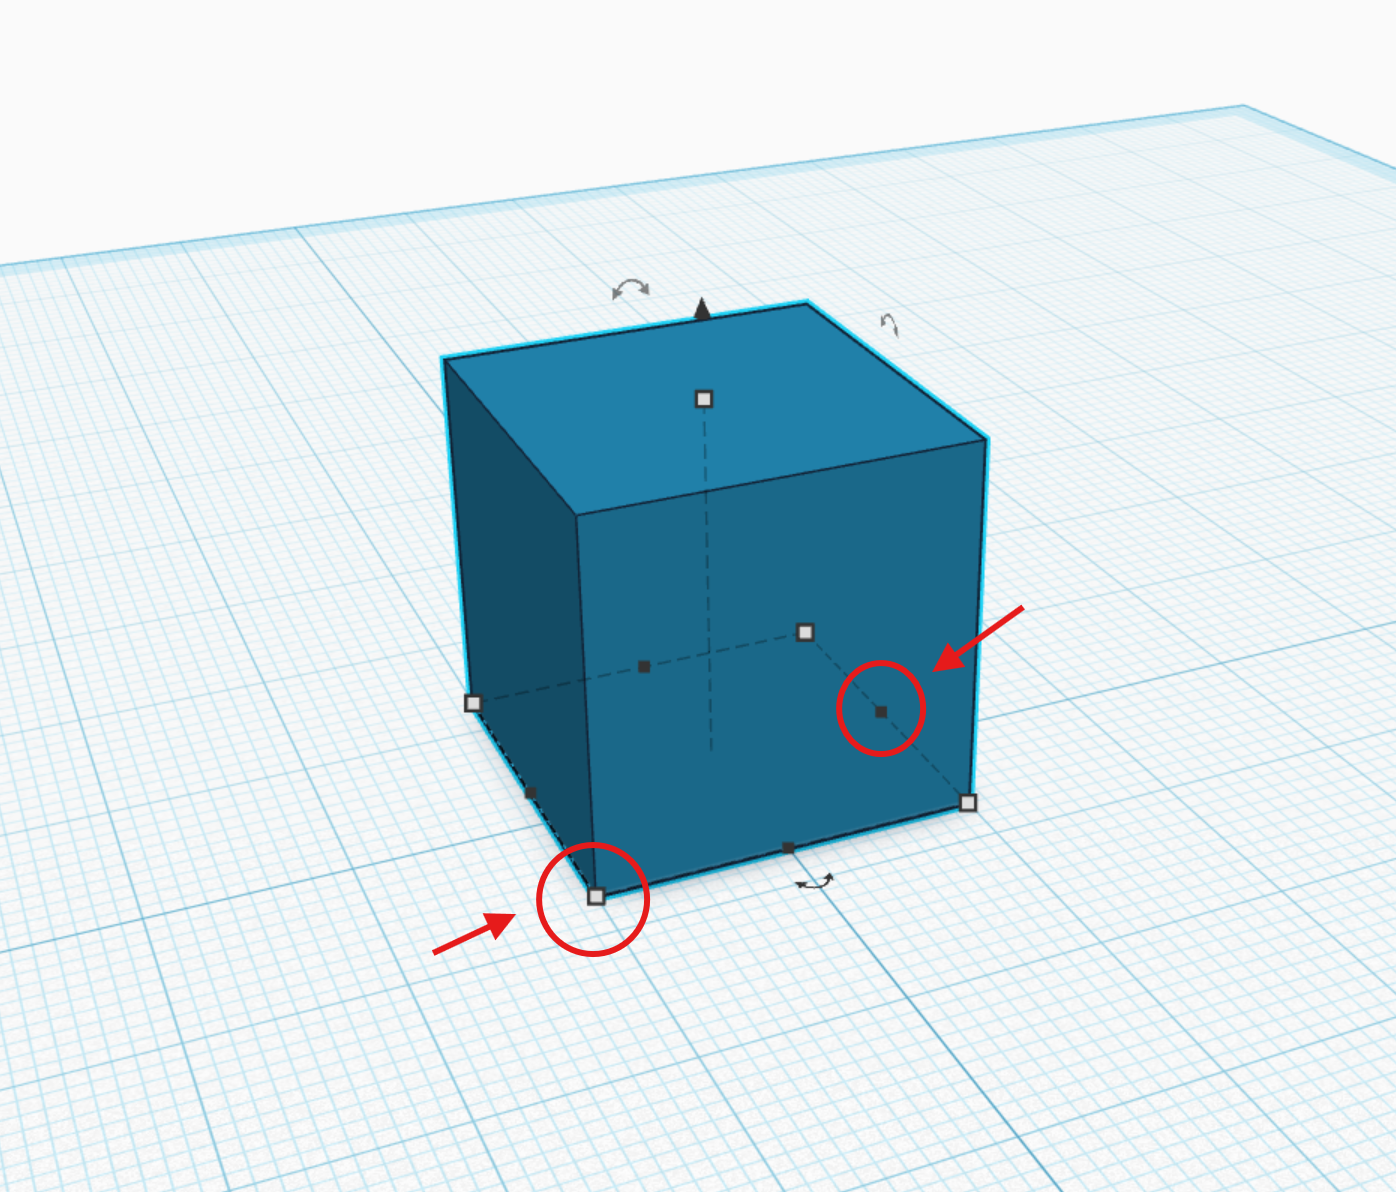
List of features for resizing. ⬇️
|
Resize Controls |
|
|
Black square handles |
Drag to resize only one side (asymmetric) |
|
White square handles |
Drag to resize two sides at once (symmetric, from center) |
|
Corner handles |
Drag to change width + depth together |
|
Top handle |
Drag to change height only |
|
Exact dimensions |
Click the shape, then type values in the W / D / H fields on the inspector (top right). Press Enter to confirm. |
|
Lock ratio |
Enable the lock icon in the inspector to scale proportionally |
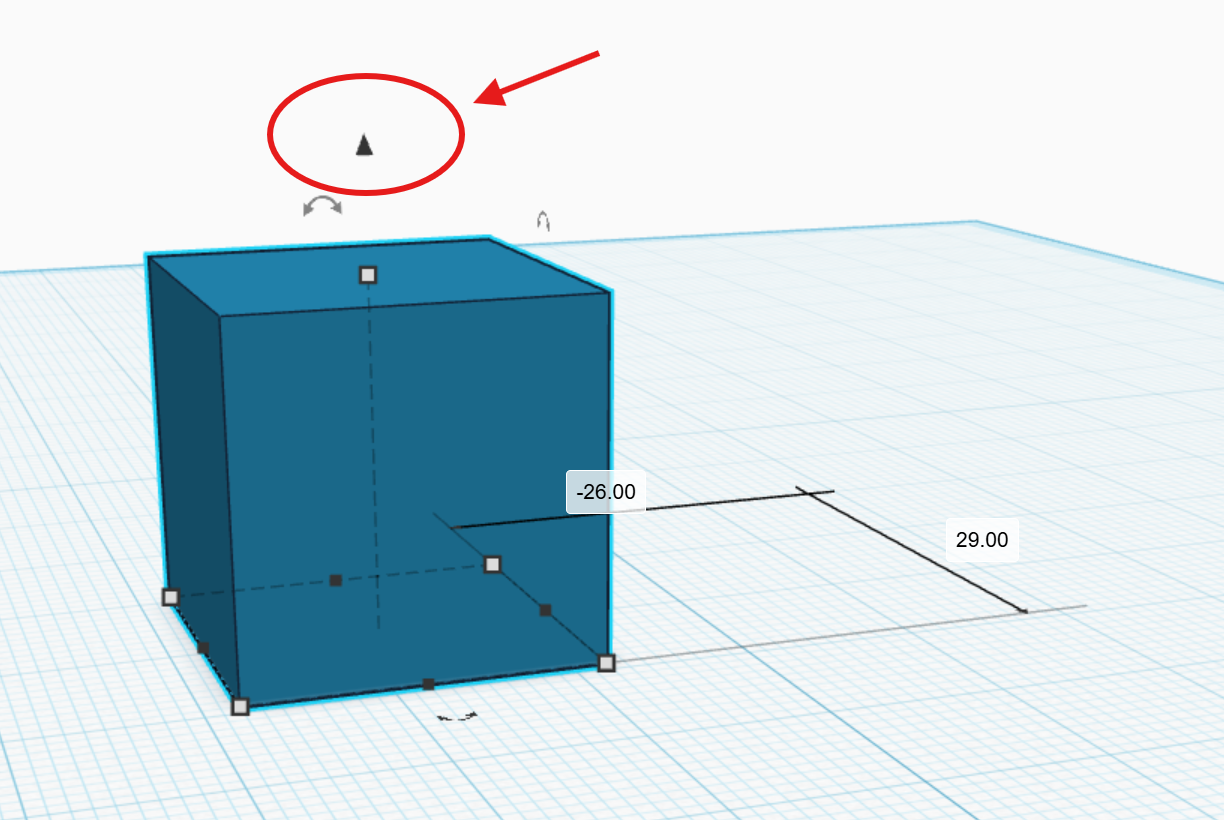
Positioning: objects are moved horizontally by dragging their base, while vertical movement is achieved using the black cones located above the shape.